4 Tips for Perfect Homemade Nata de Coco
Nata de coco has a unique chew. It is a refreshing gel, popular in desserts and drinks around the world. It comes from the Philippines. It is made from fermented coconut water.
Making your own homemade nata de coco is a rewarding project. It puts you in control. With a few key tips, a perfect batch is within reach. This guide gives you four essential tips.
You will learn to master the fermentation process, understand the ingredients, and create delicious coconut gel at home.
Disclaimer: This information is for educational purposes only and does not replace professional medical or veterinary advice. Always consult a qualified professional before making decisions related to your health or your pet’s health.
What You’ll Need?
Success starts with the right materials. The nata de coco recipe is simple, but quality matters. Sterilize all your equipment before you begin. Cleanliness prevents unwanted bacteria from spoiling your batch.
Ingredients for Success
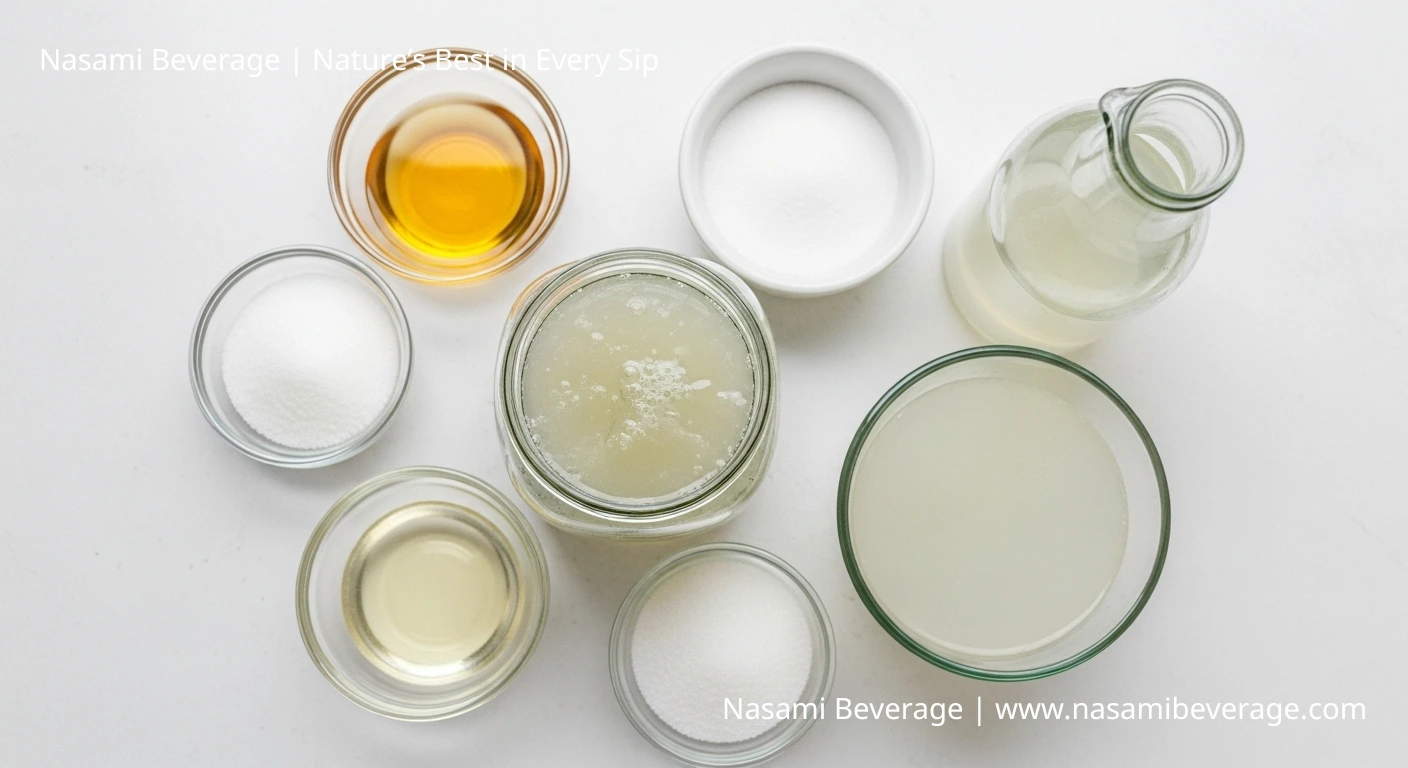
- Fresh Coconut Water: You need about 1 liter (or 4 cups). Fresh is best. It has the natural sugars the bacteria need.
- Refined Sugar: About 100 grams (or 1/2 cup). This is food for the culture.
- Mild Acid: One tablespoon of white vinegar or glacial acetic acid. This lowers the pH, creating the right environment for the good bacteria to thrive.
- Nata de Coco Starter (Acetobacter xylinum): This is the most important ingredient. You need about 120 ml (or 1/2 cup) of a potent starter.
Your Nata de Coco Toolkit
- A Glass or Non-Reactive Jar: A wide-mouthed glass jar of at least 1.5-liter capacity is ideal. Do not use metal.
- Cheesecloth or a Clean Cloth: To cover the jar. It must be breathable to allow air in but keep contaminants out.
- Rubber Band or String: To secure the cloth cover.
- Wooden or Plastic Spoon: For stirring. Again, no metal.
The Foundation – Nail Your Nata Starter and Coconut Water
The quality of your final product depends entirely on its beginning. Your starter culture and coconut water are the foundation of your homemade nata de coco. Get this part right, and you are halfway there.
Sourcing a Potent Starter Culture
The magic ingredient is the nata de coco starter. This is a symbiotic culture of yeast and bacteria, primarily Acetobacter xylinum.
This bacterium consumes the sugar and acid in the coconut water and produces a pure, edible cellulose. This cellulose is the gel you see.
You can get a starter online, from a friend who makes nata de coco, or from a previous successful batch. A healthy starter should be cloudy and may have a thin gel layer forming on top.
Its health is vital. A weak starter will lead to failure. Understanding what is nata de coco starter culture is the first step to success. This process is one of the most interesting parts of the fascinating science behind food fermentation.
Fresh is Best: Choosing Your Coconut Water
For the best results, use fresh, mature coconut water. It contains the necessary nutrients for the bacteria to work efficiently.
If you cannot get fresh coconut water, you can use packaged coconut water. However, you must read the label carefully.
Choose a brand that contains 100% pure coconut water with no preservatives or added sugar. Preservatives like potassium metabisulfite will kill the starter culture. A good beginning makes a good end.
The Sweet Spot – Perfecting the Fermentation Environment
Your mixture is alive. It needs the right environment to grow. Temperature and tranquility are not suggestions; they are requirements. Creating this perfect environment is a key part of how to make nata de coco.
Maintaining the Ideal Temperature
Acetobacter xylinum works best in warmth. The ideal temperature range is between 28-30°C (82-86°F). A consistently warm environment encourages faster and healthier cellulose growth.
Find a warm spot in your home, away from direct sunlight. This could be on top of a refrigerator or in a cabinet near the oven.
If your home is cool, you might use a seedling heat mat set to a low temperature. Cold temperatures will slow or stop the fermentation. Too much heat can kill the culture. Consistency is the goal.
Peace and Quiet: Why You Shouldn’t Disturb the Mixture
Once you have combined your ingredients and covered the jar, leave it alone. The nata de coco fermentation process requires stillness.
The Acetobacter xylinum bacteria work on the surface of the liquid. They weave the cellulose fibers into a single sheet. If you shake, stir, or move the jar, you break these delicate fibers.
This disturbance can prevent a thick, uniform gel from forming. Place the jar where it will not be knocked or moved for at least 7 to 14 days.
Patience is part of the recipe. Resisting the urge to check on it constantly is one way to avoid the common fermentation mistakes you must avoid.
The Transformation – Monitoring and Harvesting Your Nata
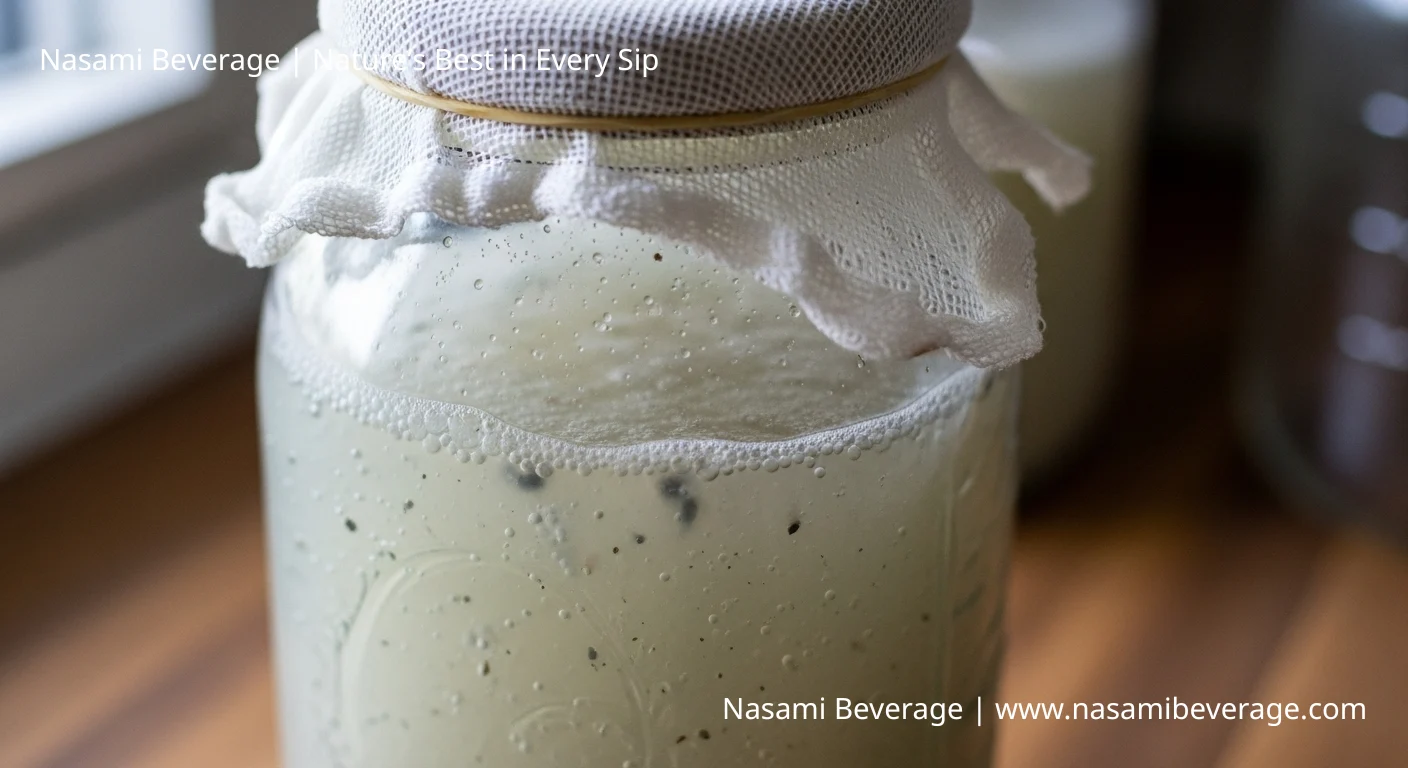
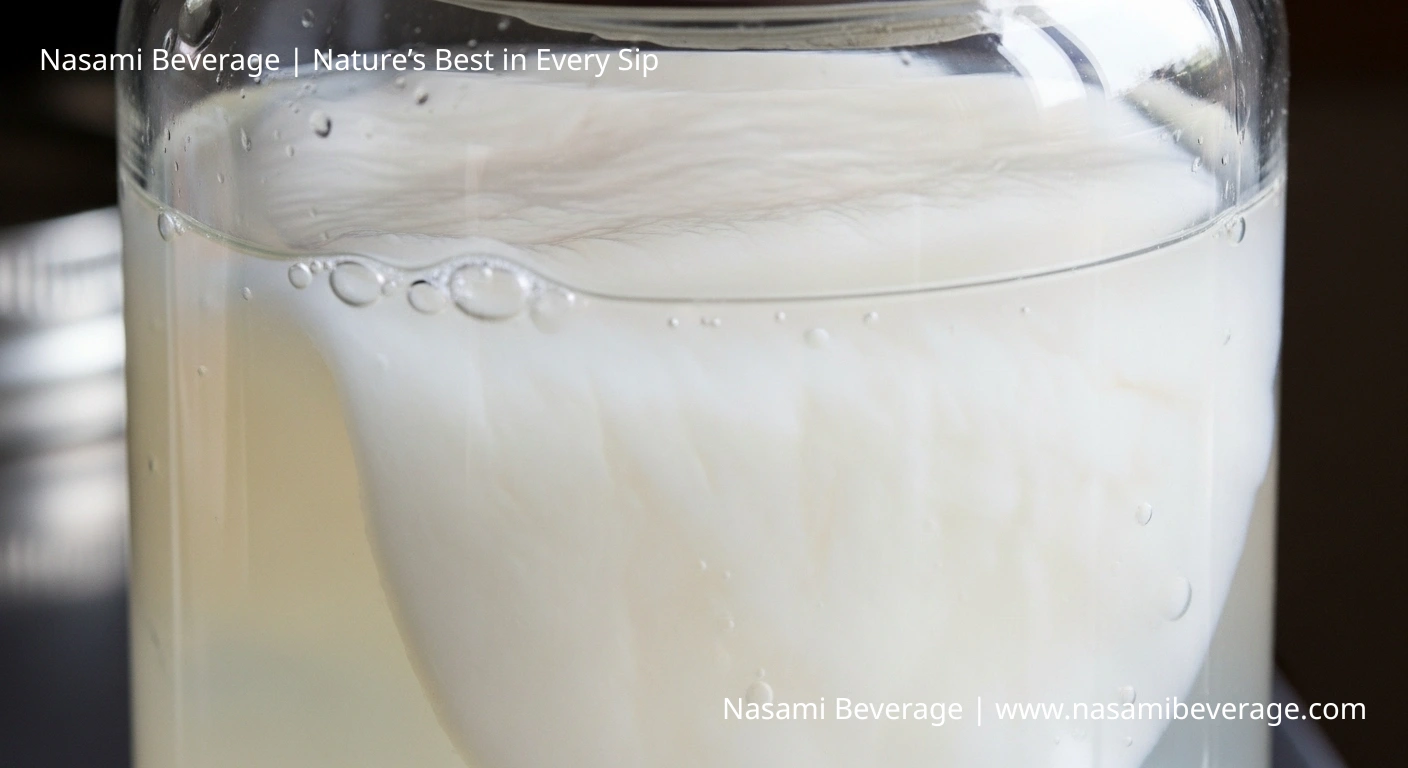
After a week or two of patience, the transformation becomes visible. A milky-white, gelatinous layer will have formed on the surface. Now you must know when and how to harvest it.
Knowing When It’s Ready
The nata de coco is ready for harvest when the sheet is at least 1 to 2 cm (about half an inch) thick. It should be firm, opaque, and resilient to a gentle touch.
The time it takes can vary. A strong starter and warm temperatures might produce a thick layer in 7 days. A weaker culture or cooler room could take 14 days or more. Look for thickness and firmness. That is your sign.
The Harvest: From Sheet to Cubes
Harvesting is straightforward. First, wash your hands and utensils well. Carefully lift the cellulose sheet out of the jar.
The liquid left behind is now a potent starter culture for your next batch. Rinse the nata sheet under cool, running water.
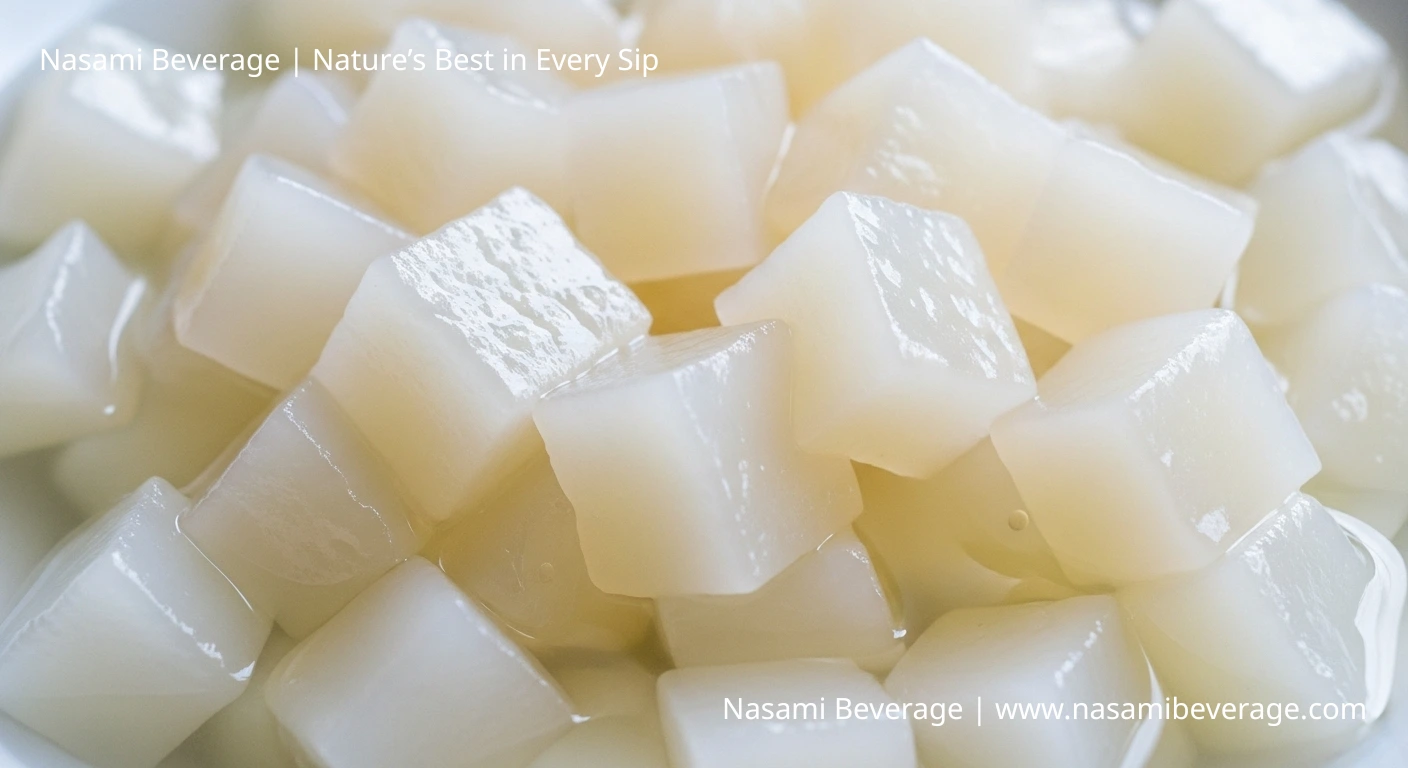
It will have a sour, vinegary smell. This is normal. The goal of rinsing is to remove the acidic residue. Place the sheet on a clean cutting board and cut it into your desired cube size.
The texture should be firm and springy. This delicacy has a rich history, and you can learn more about discover the history of this unique Filipino delicacy.
The Finishing Touch – Flavoring and Storing Your Creation
Your harvested nata de coco is not yet ready to eat. It is sour and bland. The final steps involve neutralizing the acidic taste and adding sweetness. This makes it the delicious treat you find in drinks from brands like Mogu Mogu.
From Sour to Sweet: The Final Boil
To remove the sourness, you must boil the cubes. Place the fresh nata cubes in a pot of water and bring it to a boil. Boil for 5-10 minutes, then drain.
Repeat this process two or three times, using fresh water each time. Taste a cube after the third boil. If it no longer tastes sour, you can move to the next step.
Next, create a simple syrup. A common ratio is one part sugar to two parts water. Bring the syrup to a boil, then add the neutralized nata de coco cubes. Simmer for 10-15 minutes.
This allows the cubes to absorb the sweetness. You can add flavor extracts like pandan or vanilla at this stage. Once complete, you can use your nata in countless ways.
Check out our complete guide to delicious bubble tea recipes or explore other desserts. You will be amazed when you find out you won’t believe these other amazing coconut recipes.
Proper Storage for Lasting Freshness
Let the nata de coco and syrup cool completely. Transfer everything to a clean, airtight container. Store it in the refrigerator.
Your homemade nata de coco will last for up to two weeks when stored correctly in its syrup. The syrup acts as a preservative.
Frequently Asked Questions (FAQ)
What is the white layer that forms on top?
The white, jelly-like layer that forms on the surface is the nata de coco itself. It is a biofilm of pure, edible cellulose produced by the Acetobacter xylinum bacteria as they consume the sugars in the coconut water. This is the successful outcome you are looking for.
Can I use packaged coconut water to make nata de coco?
Yes, you can use packaged coconut water, but you must choose carefully. Select a brand that is 100% pure coconut water with no added sugar or, most importantly, preservatives. Preservatives like sulfites will inhibit or kill the bacterial culture, preventing the nata from forming. Always check the ingredients list.
How do I know if my nata de coco has gone bad?
Your fermentation has gone bad if you see fuzzy mold (usually green, black, or orange spots) on the surface instead of a uniform white sheet. It may also develop a foul, rotten smell instead of a clean, vinegary one. If you see mold or it smells putrid, discard the entire batch and start over with sterilized equipment.
Why didn’t my nata de coco form a jelly?
There are several common reasons for failure. Your starter culture may have been too weak or inactive. The room temperature might have been too cold, slowing the bacteria down. You might have disturbed the jar during fermentation. Finally, your coconut water may have contained preservatives that killed the culture.
Making nata de coco is an act of patience. It is a process of turning simple ingredients—coconut water, sugar, acid-into something special.
Success hinges on four things: a quality start, a stable environment, a timely harvest, and a proper finish. It shows that good things take time.
By following these tips, you can enjoy a pure, preservative-free product made in your own kitchen. As the famed food writer Craig Claiborne said, “Cooking is at once child’s play and adult joy.
And cooking done with care is an act of love.” Remember the crucial role of a healthy starter culture, and you will be on your way.
